


(This post is part 1/6- so make sure to read the others! While you’re reading, click anything blue and you will see I attached links or additional images for more information!)
Welcome to this post! If you don’t already know, Greg and I love to travel. Before we were even engaged, we talked about the idea of having a National Park Honeymoon as we have been to Europe a few times, but have not seen most of our own country. Planning for our June honeymoon began in January as something like this takes a long time to plan. We were determined to complete 100 miles on foot between hikes and exploring. Do you think we hit our goal? Continue reading through our posts to find out!
Greg and I were lucky enough to start our honeymoon at Yosemite National Park. Here is a guide for our 2.5-day trip we spent here. We hope you can learn from our experience and we wish you the best of luck if you are planning to travel here!
(We arrived the 2nd week of June and were told there would be more visitors this weekend than Memorial Day weekend due to the weather, so this information below is based off that. Some trails were also closed due to the extreme snowfall they experienced this year- you can find a list of the closed trails on the Yosemite National Park website or by calling.)
*All times included our time spent taking pictures and enjoying the views.
Day 1- Friday
After 19 hours of traveling, we arrived around 8pm at our campground: Indian Flat RV Park– full hookup RV sites are $48 a night, including showers, a restaurant within walking distance, general store, grill, and picnic table (unfortunately no fire pit). There are cheaper RV parks that we found but Indian Flat was only 35 minutes from the entrance of Yosemite (turn right out of the RV park and follow it up, no turns).
We were pretty hungry/tired when we arrived so we went to the local restaurant/bar for dinner which is next door to where we were staying: Canyon Bar and Grill– the food was good, but small, and in my opinion, a little over-priced. I got a grilled chicken sandwich and Greg got a patty melt, for $26.00 (not including tip).
Day 2- Saturday
Bridalveil Falls
Distance- 1 mile (total out and back)
Our Time- 30 minutes
Shuttle- no shuttle stop, there is a parking lot
Handicap Accessible

We woke up around 6:30am to get to Bridalveil Falls early- we were told this parking lot fills up and if there are no spots, you will probably have a far walk for a short hike. I recommend planning to start your day with this hike. After getting ready and driving, we arrived at 7:30am and there were plenty of spots available. We finished the hike around 8:00am and still less than half of the spots were filled. Bridalveil Falls is an easy hike but has a short/steep incline at the top. When we visited it was very wet. Our shoes did not get wet but others said their shoes were soaked which caused their feet to be cold for hours. It was also very cold at the top.
We then drove from Bridalveil Falls to the Yosemite Valley Lodge (this is where RVs must park) in order to catch our first ride on the free shuttle. We took the shuttle from the Lodge (shuttle stop #7) to the Visitor Center/Theater (shuttle stop #9) which opened at 9:00am.
From the Visitor Center we got back on the shuttle and headed to the Mirror Lake Trail.
Mirror Lake Trail
Distance- 1.8 miles (total out and back) or 5 miles (around)
Our Time- 3 hours for a modified 5 mile loop
Shuttle- #17

When hiking this trail you have the option to either hike out to the lake and turn around or to hike all the way around the lake and make a circle. Our original plan was to hike around the lake but along the way, we met people who informed us that the conditions were not the best (1 area required you to take your shoes off to hike through water and the other required you to go off the trail because the path was flooded- not appealing for us). We decided to hike to the very top and once we reached Snow Creek Falls we turned around. This hike was about 5 miles total but was a really good hike with plenty of shade and visits from animal friends!
From the Mirror Lake Trail we got back on the shuttle and headed to The Loft at Degnan’s for lunch (shuttle stop #4). Here, you have 2 options- a deli on the first level with ordering kiosks (pizza, sandwiches, all day breakfast, etc.) or you can go upstairs for a set menu. We decided to go upstairs and the food was great. The portions were also great and the prices were not bad. I ordered a Teriyaki Chicken bowl and Greg ordered a Beef Burrito all for $22 (we expected prices to be higher inside the park).
After lunch we got back on the shuttle and headed to the Lower Yosemite Falls, we were told if you are visiting Yosemite then you must do this hike.
Lower Yosemite Falls
Distance- .5 miles (total out and back)
Our Time- 30 minutes
Shuttle- #6
Handicap Accessible

The views at this hike were wonderful! You could get so close to the waterfall and there was a nice mist to cool you off. This hike is almost entirely handicap accessible too!
This trail concluded our day so we headed back towards the shuttle stop. We ended up waiting in long line for 35 minutes so we decided we would just walk back to our car. This took us about 15 minutes- probably because we were exhausted from our day!
On the way out of the park we stopped for gas and paid a hefty $4.78!!! Crazy, right!? But we needed gas and this was the only place around. It was a Chevron gas station located 8 minutes from our RV campground. If we wanted to go elsewhere, we would have had to add another 30 minutes to our drive to find another. We recommend filling up if you happen to drive by a place with decent pricing.
Day 3- Sunday
Our alarms went off at 6:15 on day 2 in order to get to the recommended hikes early. (No worries, we were both asleep by 9:00pm the night before. Man were we exhausted!)
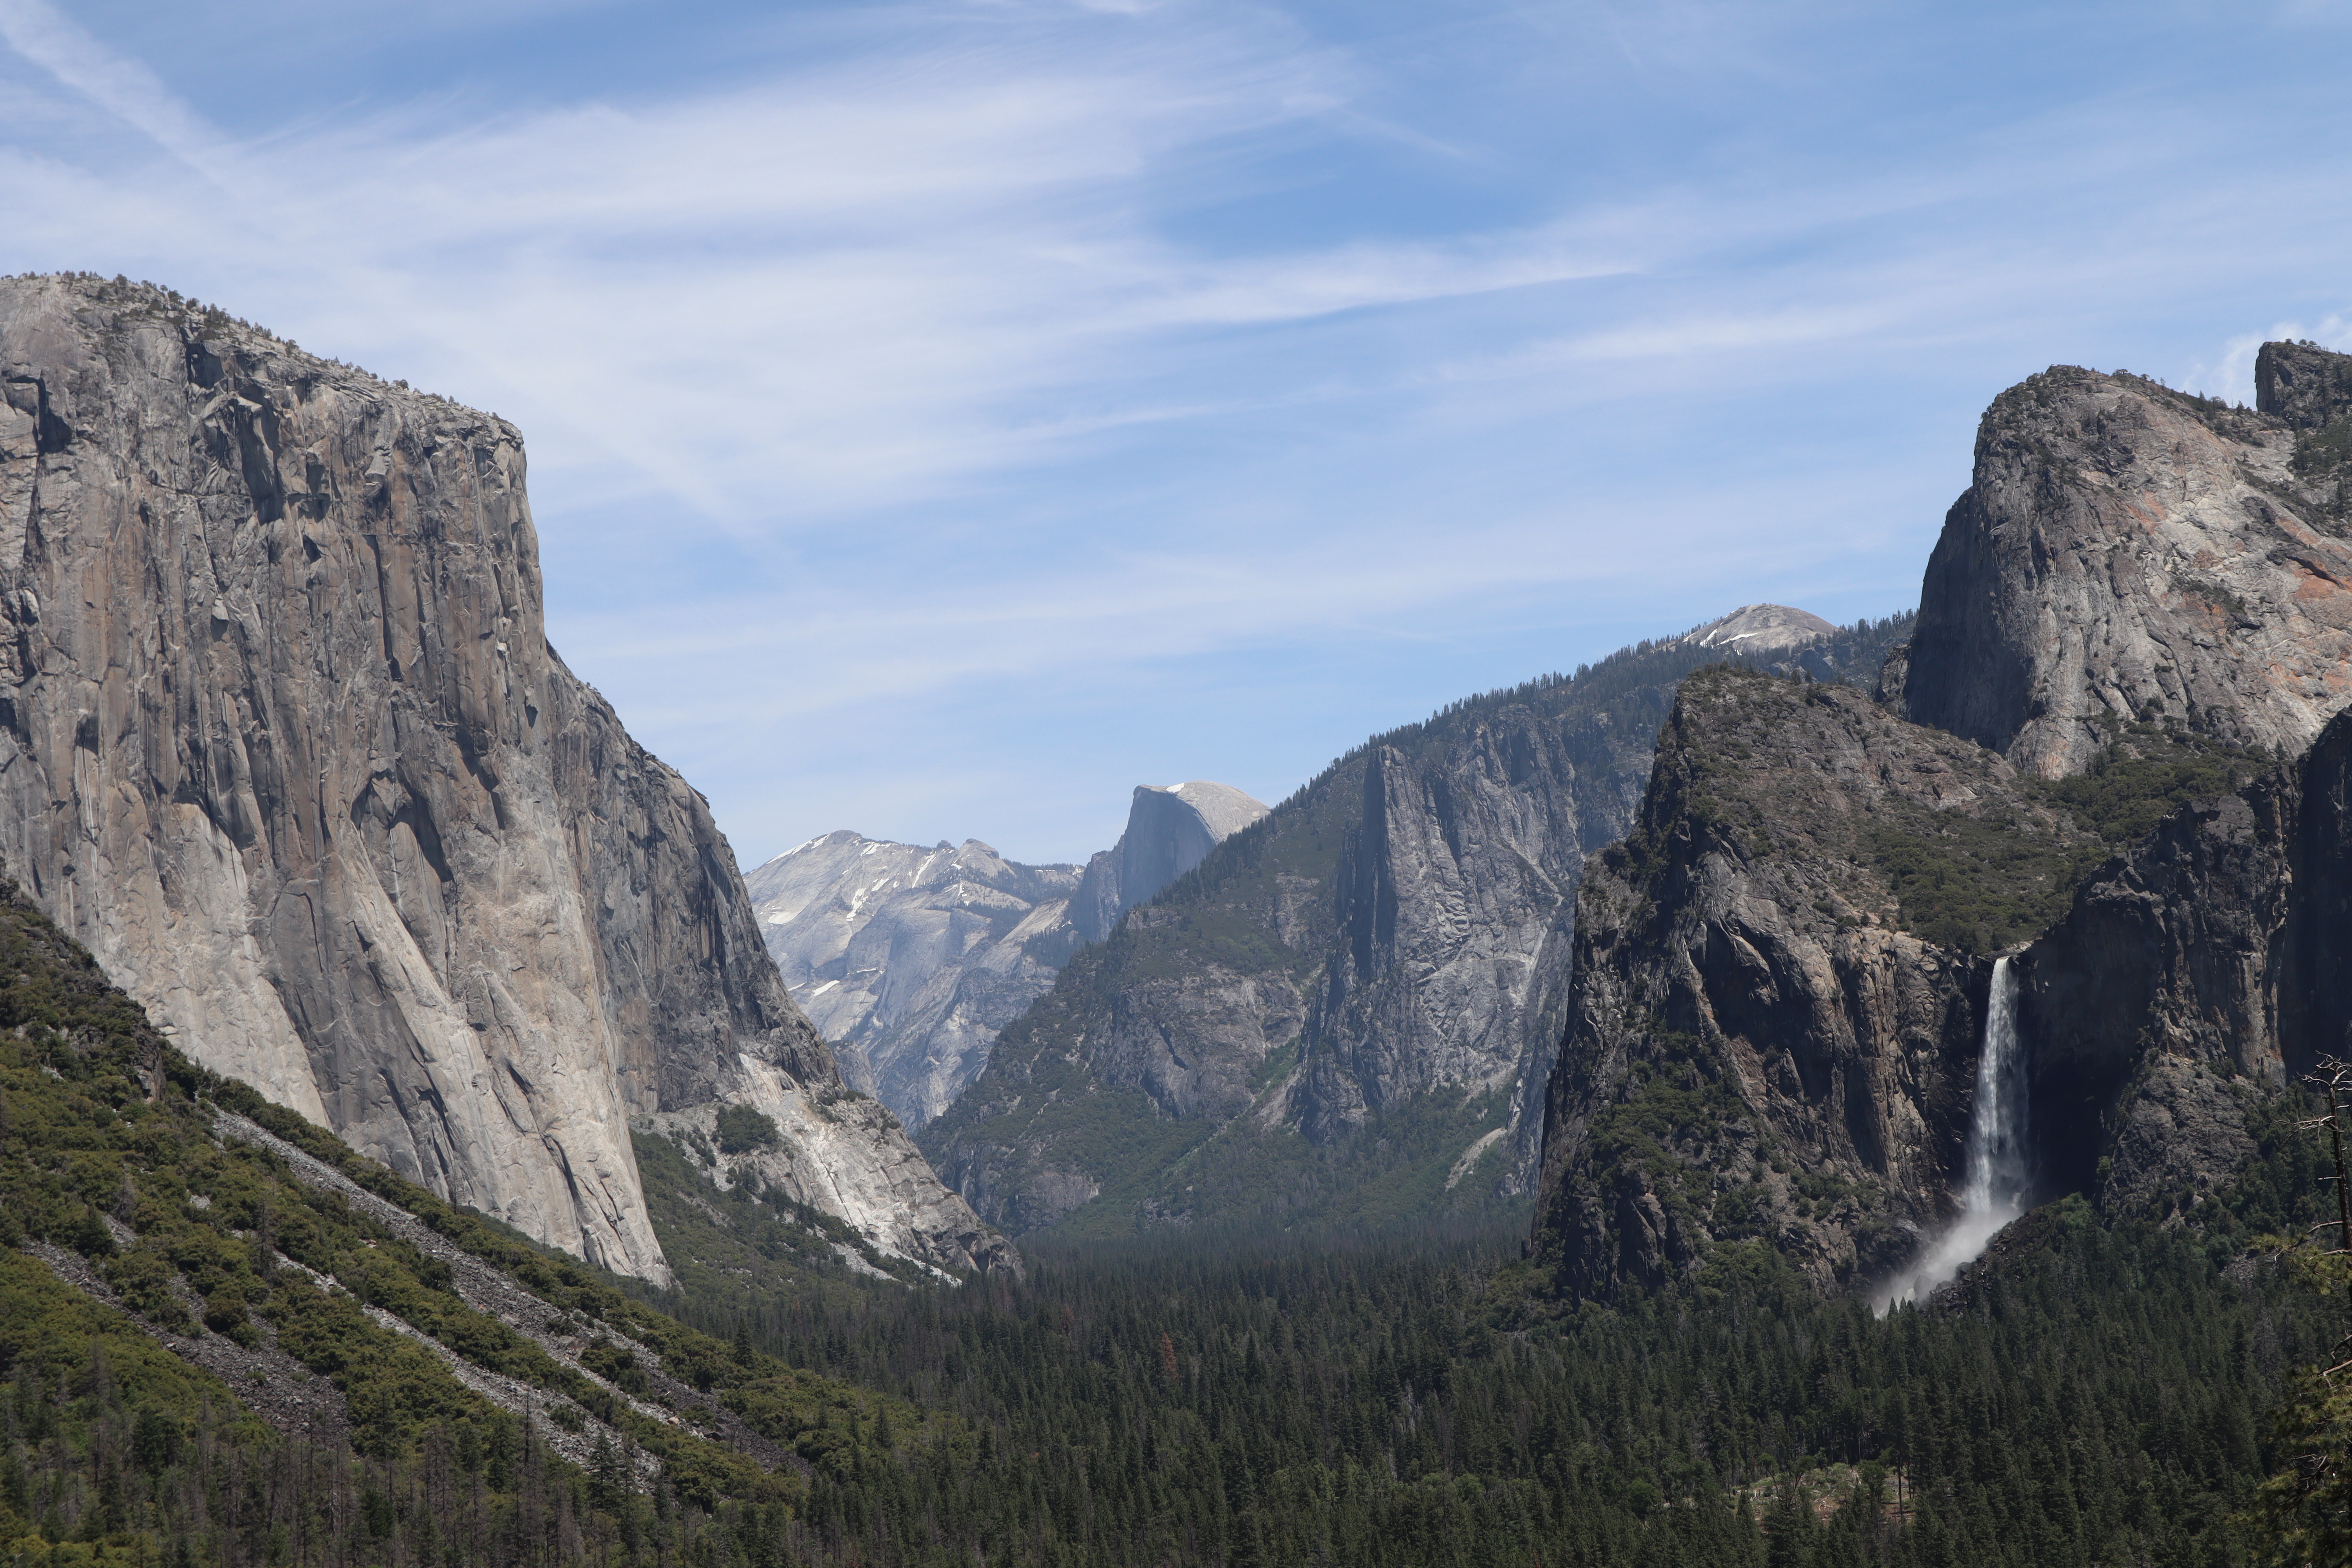
On our way to our first hike, we stopped at Tunnel View. We had planned to visit this after our hike, but the parking lot was nearly empty as we drove past (7:30am). The views were great but our pictures were a little washed out as the sun was rising at this time. It was still great to see firsthand with your own eyes though!
From Tunnel View, we continued to drive up the mountain to the Sentinel Dome/Taft Point Trailhead. I was terrified during the drive up because there are no rails to protect you while you’re 6,000+ feet up! I constantly felt myself leaning while in the passenger seat away from the drop off (lol). So I definitely recommend taking your time and allow others to pass if needed.
Sentinel Dome/Taft Point Trail
Distance- 2 miles (total out and back) or 4.5 (loop)
Time- 2.5 hours for the 2 mile trail
Shuttle- no shuttle stop, parking lot located at the trailhead.

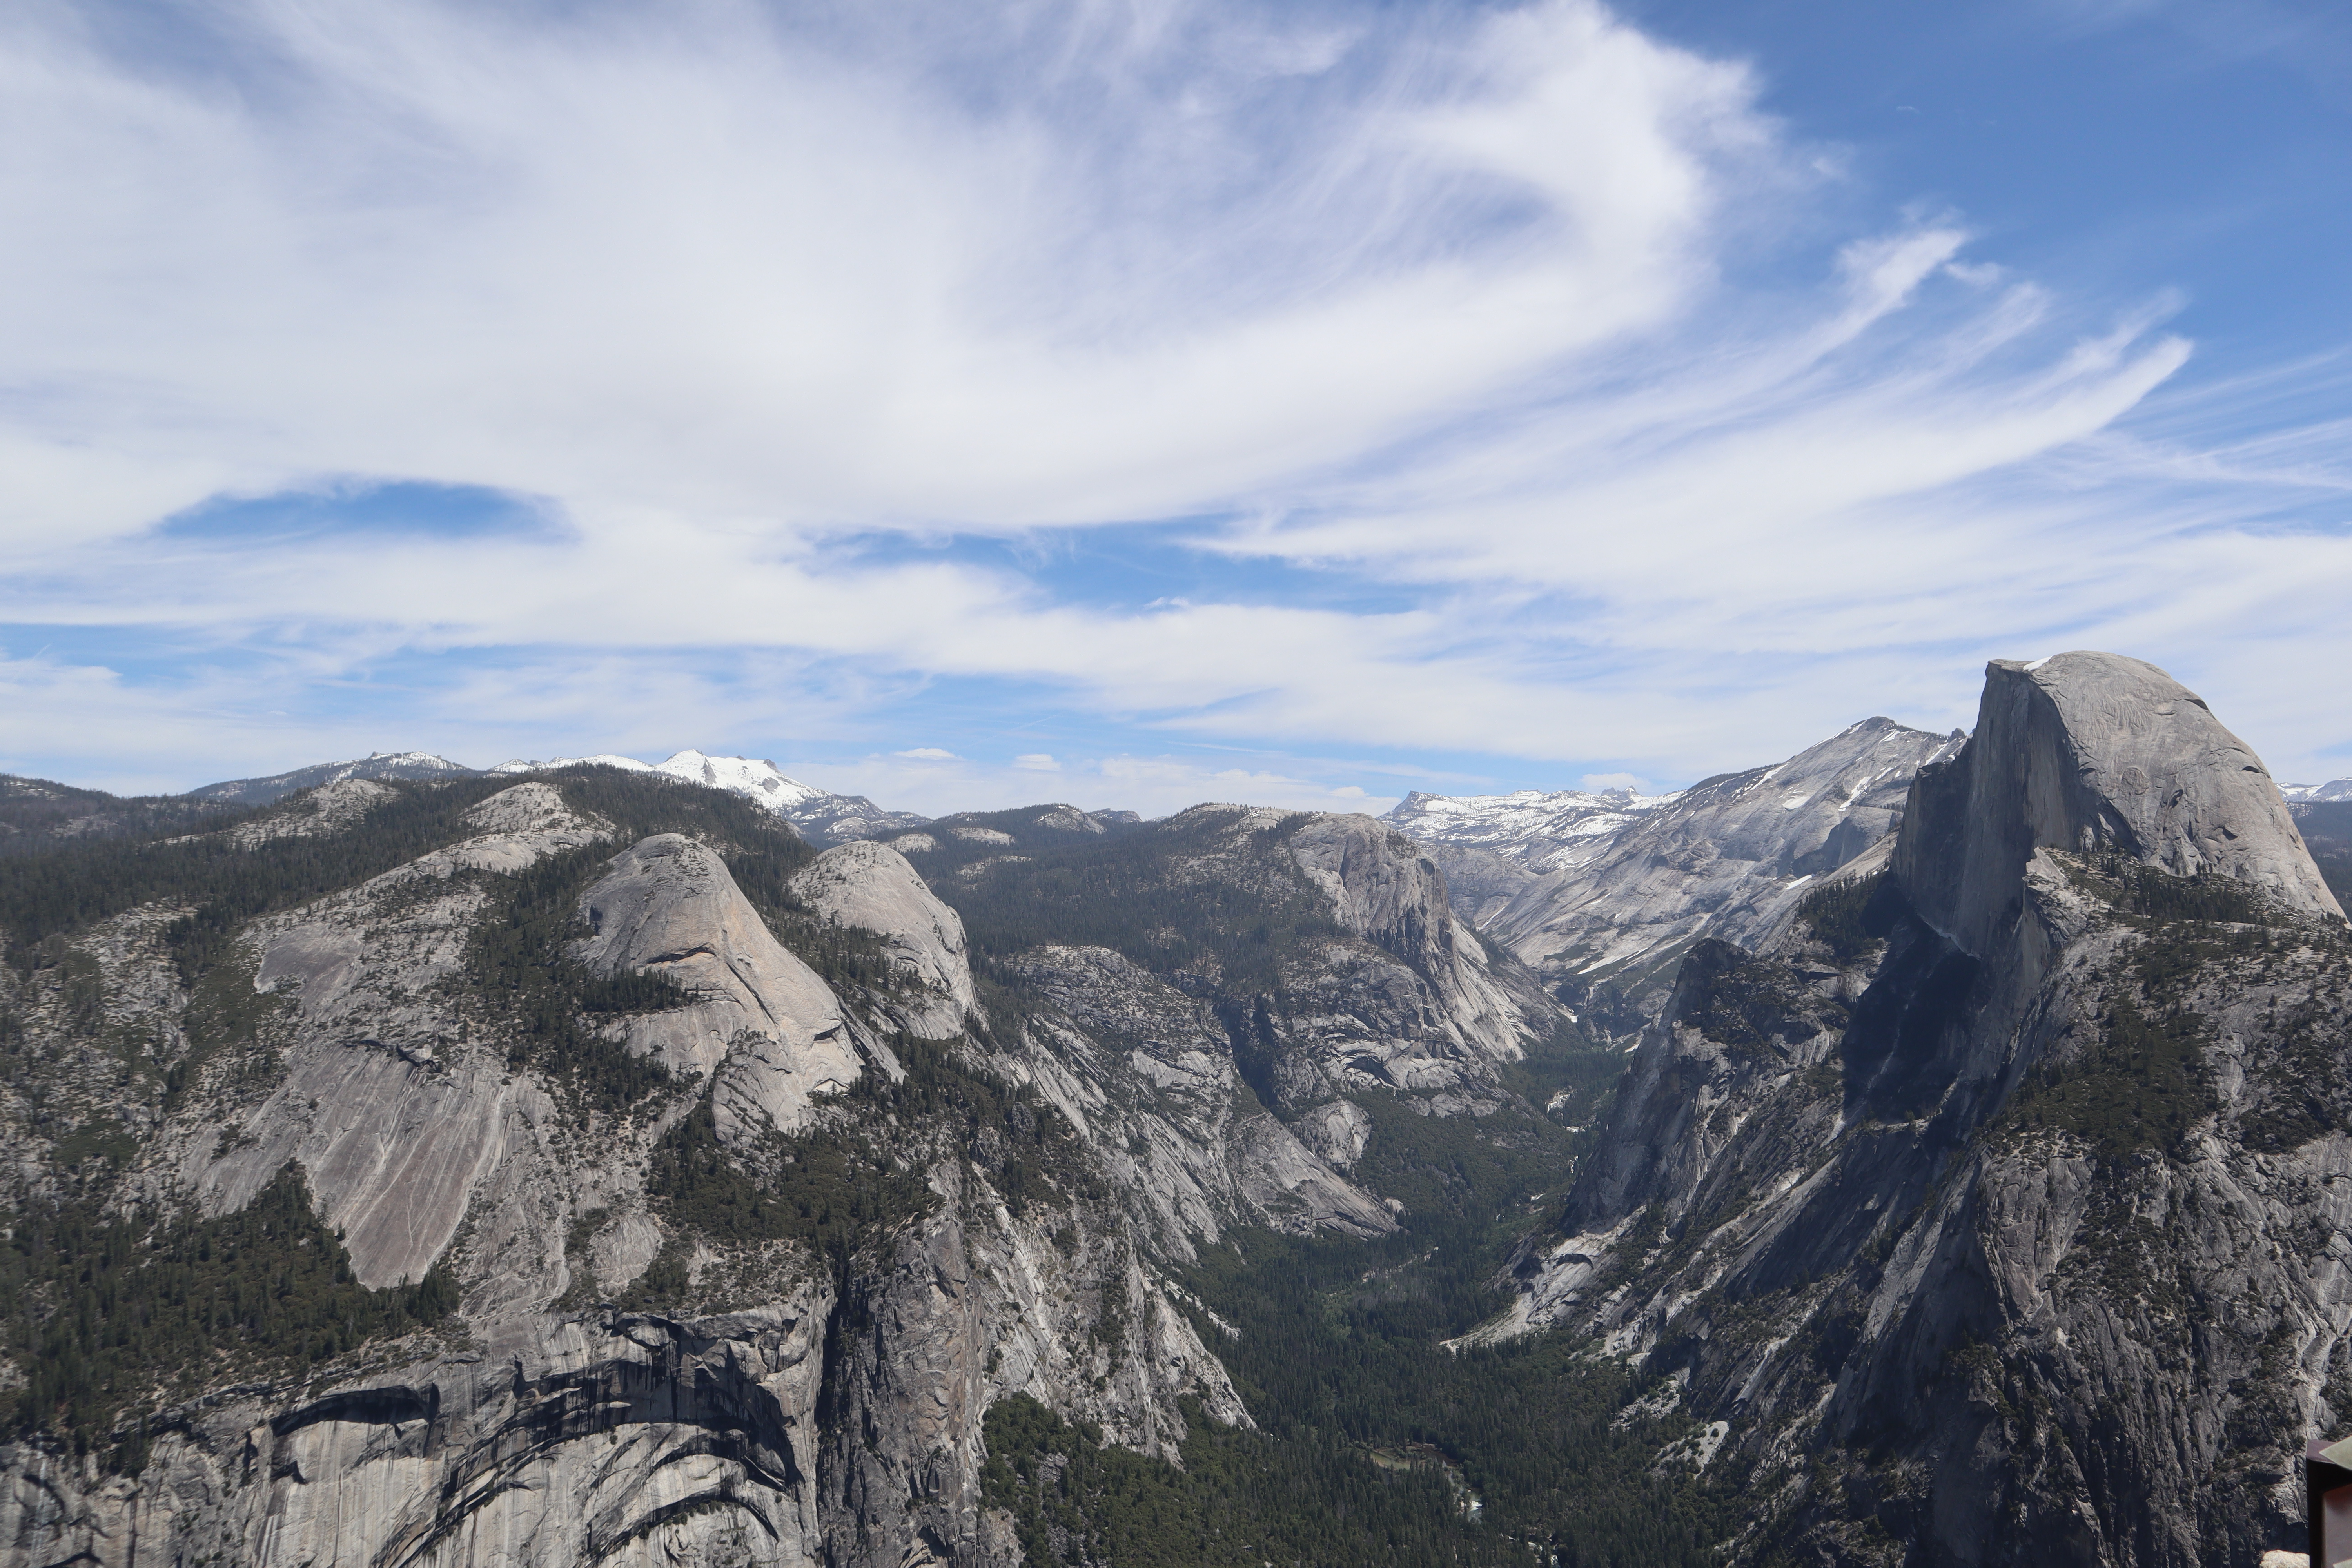
We arrived here at 8:00am and we were one of maybe ten cars in the parking lot- just under ½ full at this time. Our original plan was to do the entire loop in a counter- clockwise direction as recommended but after visiting the Visitor Center, we were informed part of the Taft Point loop was under about 5 feet of snow and greatly impacted ability to locate the trail. Instead, we walked from the Sentinel Dome/Taft Point Trailhead up to the top of Sentinel Dome and back. Towards the end, there is a steep incline, and at the time of our visit, it was covered in snow; made it extra fun to climb! This was hands down the best view we saw during our time at Yosemite. Greg and I kept saying “Is this real? It looks like a fake backdrop.” We 100% recommend this hike if you can only do one during your time here.
From the Sentinel Dome/Taft Point Trailhead, we traveled to Glacier Point which was only 10 minutes away. Online I read to arrive before 10:30am or after 5:00pm. We arrived at 10:45am and were lucky to find a parking spot (after being told we would not be able to, on our way out someone was leaving!). We spent about an hour here looking at the amazing views, taking pictures, and visiting the gift shop. On our way out was a line of over 50 cars waiting to find a spot in the parking lot. If this happens to you, try to park up the road more and make the extra walk. The hike to the top is very short.
On our way back down the mountain, we made another stop at Tunnel View. We arrived around 1:30, the parking lot was PACKED and people were illegally parked which was annoying and made it difficult to navigate an RV. We ended up finding a spot and were able to get more pictures that weren’t washed out. Overall, I would recommend getting to this location between 8:00-10:00am or later in the day.
As we continued down the mountain, we passed the Sentinel Dome/Taft Point Trailhead and the Bridalveil Falls Trailhead- both were so packed the streets were lined with cars trying to find any spot they could fit in. This justified our 6:15am alarm which allowed us to enjoy the hikes with minimal people around.
At the end of our day, which was only around 2:00pm, we decided to make one last trip into Yosemite Village. We parked at the Yosemite Lodge and walked 15 minutes to the Visitor Center because we knew waiting for a shuttle at this time would take forever. We continued to be amazed by the views and wildlife that walks around as if no one is there.
If you have been to this park or go for a visit, let me know what your favorite hike is!
OTHER PARK INFORMATION
SHUTTLE SYSTEM- The free shuttle system at Yosemite is great. In the morning from 7:00am-10:00am it is scheduled to come every 30 minutes, from 10:00am-10:00pm it is scheduled to come every 20 minutes. Towards the end of the day you can wait upwards of 40 minutes and in a line of people so check the map to see how far you are from the next stop, it may only be a 5-minute walk!
VISITOR CENTER- Definitely make a stop here. The rangers can provide you with any information or questions you may have. You can buy souvenirs at the gift shop, grab free maps (we lived off of ours), visit the theater, and get a stamp for your National Park Passport! We started our National Park patch collection here- if you are visiting the parks maybe you will enjoy starting a collection of something like us!
CELL SERVICE- We had absolutely no service at our campsite and limited service once inside the park. I would 100% recommend loading the directions from one place to another on your phone beforehand and taking screenshots- this helped us! We were told to download the app “You Need A Map” for trails, but be aware, it may drain your battery.
FOOD- We packed a lot of snacks for our hikes including trail mix, crackers, etc. Having the RV available after each hike was very convenient for meals as well. I would recommend packing sandwiches for the longer hikes.
WEATHER- The weather here fluctuated. We woke up freezing and even the start of some hikes were cold, but by the end of the day we were hot. Wear layers that you can remove. All of the hikes we started in long sleeves/pants but we had an extra shirt in our bags.
TRAILS- Unfortunately, with the limited time spent here and due to the weather conditions, we were unable to do everything we planned. We did expect this and definitely plan on returning. If you are limited on time, plan out your top trails and do them first; you might be surprised that you have extra time in the day that allows for more adventures.
GAS- As I mentioned above, we paid $4.78 for gas at a Chevron going into the park. We recommend you fill up your tank before you get close to the park, even if you are ¾ full, I promise it will save you money. We found out the hard way but this was our first park and our first time in an RV together.
OUR NUMBER 1 RECOMMENDATION- Start your mornings early!!
OUR NUMBER 1 RECOMMENDED TRAIL- Sentinel Dome! Starting at Sentinel Dome/Taft Point Trailhead and then continuing counter clockwise.
